| This article is a stub. You can help Satisfactory Wiki by expanding it. |
Balancer may refers to Load Balancer or Belt Balancer. Splitters are built in a nested way, such that all downstream belts or buildings receives equal amount of material, regardless if the supply belt is providing sufficient input. Factory built this way tends to start up faster, as there is no need to wait for the internal storage to pile up. The size of a balancer grows polynomially (n = 2) as the number of building increases.
Load balancer
A Load balancer splits 1:n belts equally (1 input belt, n output belts).
Construction
- A Splitter has a single belt input that can split into 2 or 3 outputs.
- To make 1:4 or 1:8 balancer, simply nest the 1:2 balancers. To make 1:9 or 1:27 balancer, simply nest the 1:3 balancers.
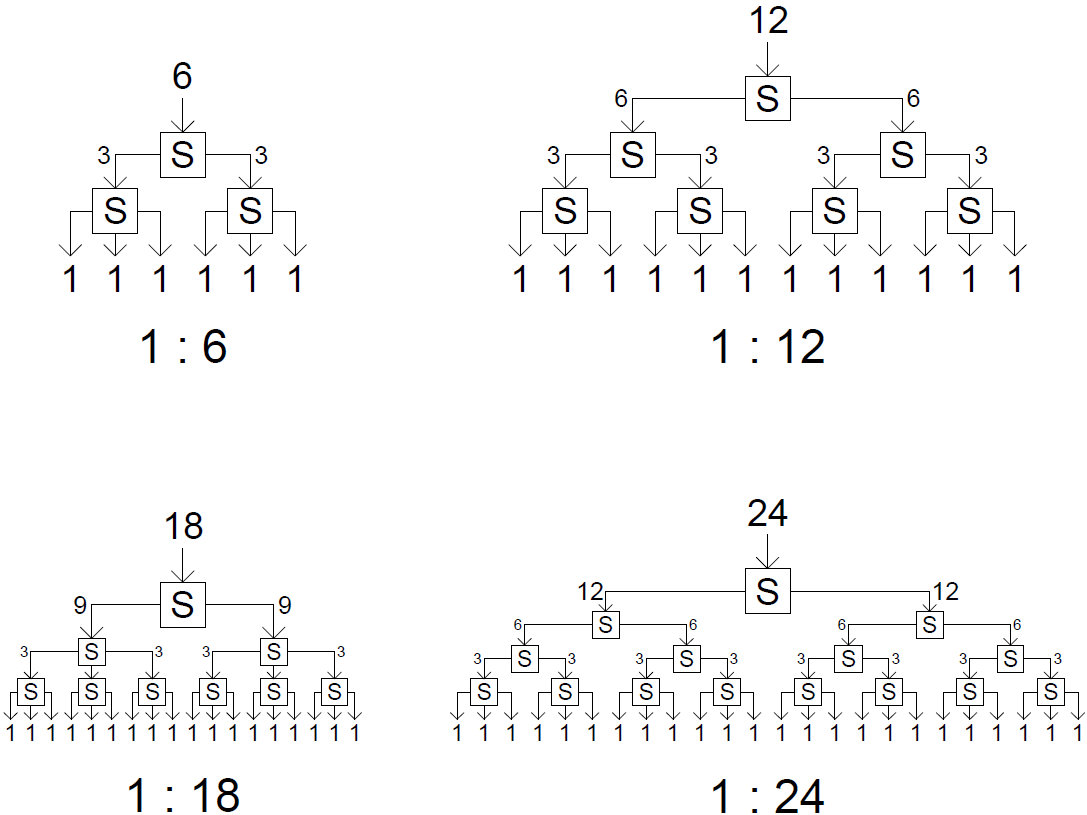
- Similar to above, any balancer that can be made from multiplications of 2 and 3 can be built. Example, 6, 12, 18, 24, etc.
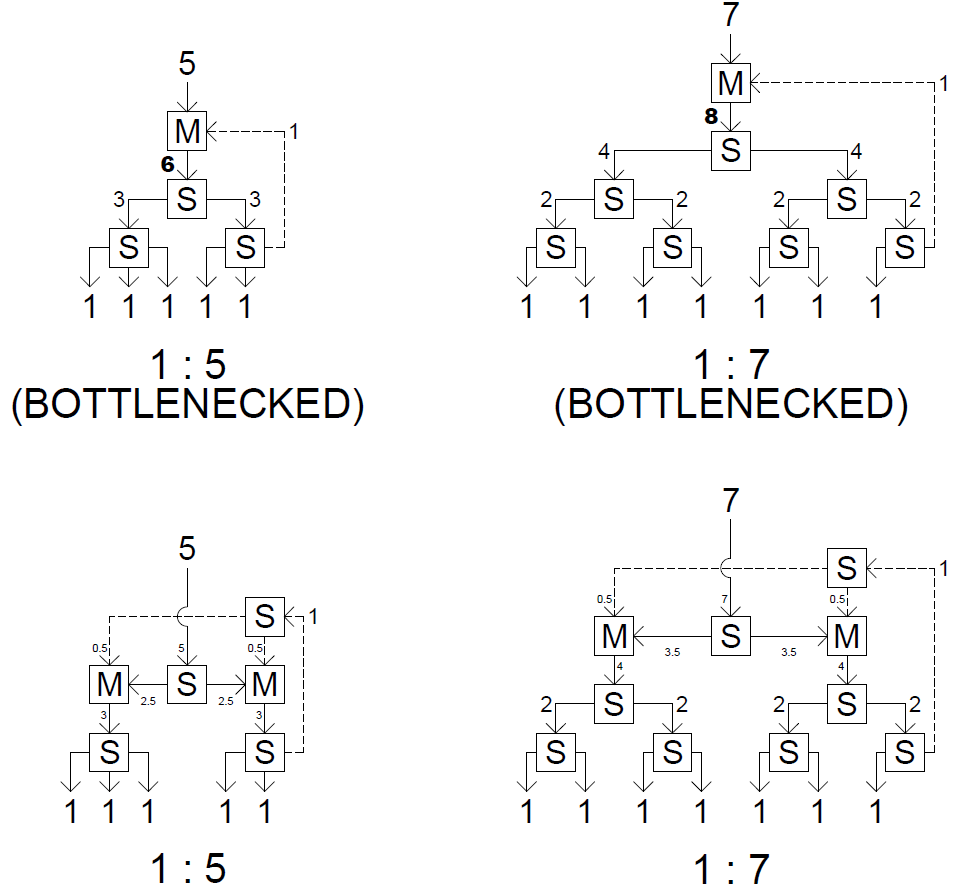
- Balancer with other numbers can be built with simple loop-back. This loopback will consumes some of the belt capacity, reducing the overall throughput. Loop-backs of this sort are necessary for producing fractional splits with denominators that have a prime number composition of values other than 2 or 3. This topic is discussed in detail at Tutorial:Prime splitter arrays.
- Round up the number and build the nearest perfect balancer, then loop back all the unused output.
- In some cases, there may be more than 1 unused output. Use mergers to combine them into a single belt before loopback.
- To maintain the throughput, the loopback can be split and distributed evenly among the splitted outputs, using additional splitters and mergers.
- All the above principles apply to balanced Mergers. Just flip the entire setup vertically and swap all the splitters and mergers.
| 1:n | Modified from 1:m | Outputs to loopback | Remarks |
|---|---|---|---|
| 5 | 6 | 1 | |
| 7 | 8 | 1 | |
| 10 | - | - | Split into 2, each using 1:5 balancer |
| 11 | 12 | 1 | |
| 13 | 16 | 3 | Combine 3 unused outputs before loopback |
| 14 | - | - | Split into 2, each using 1:7 balancer |
| 15 | 16 | 1 | |
| 17 | 18 | 1 |
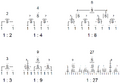
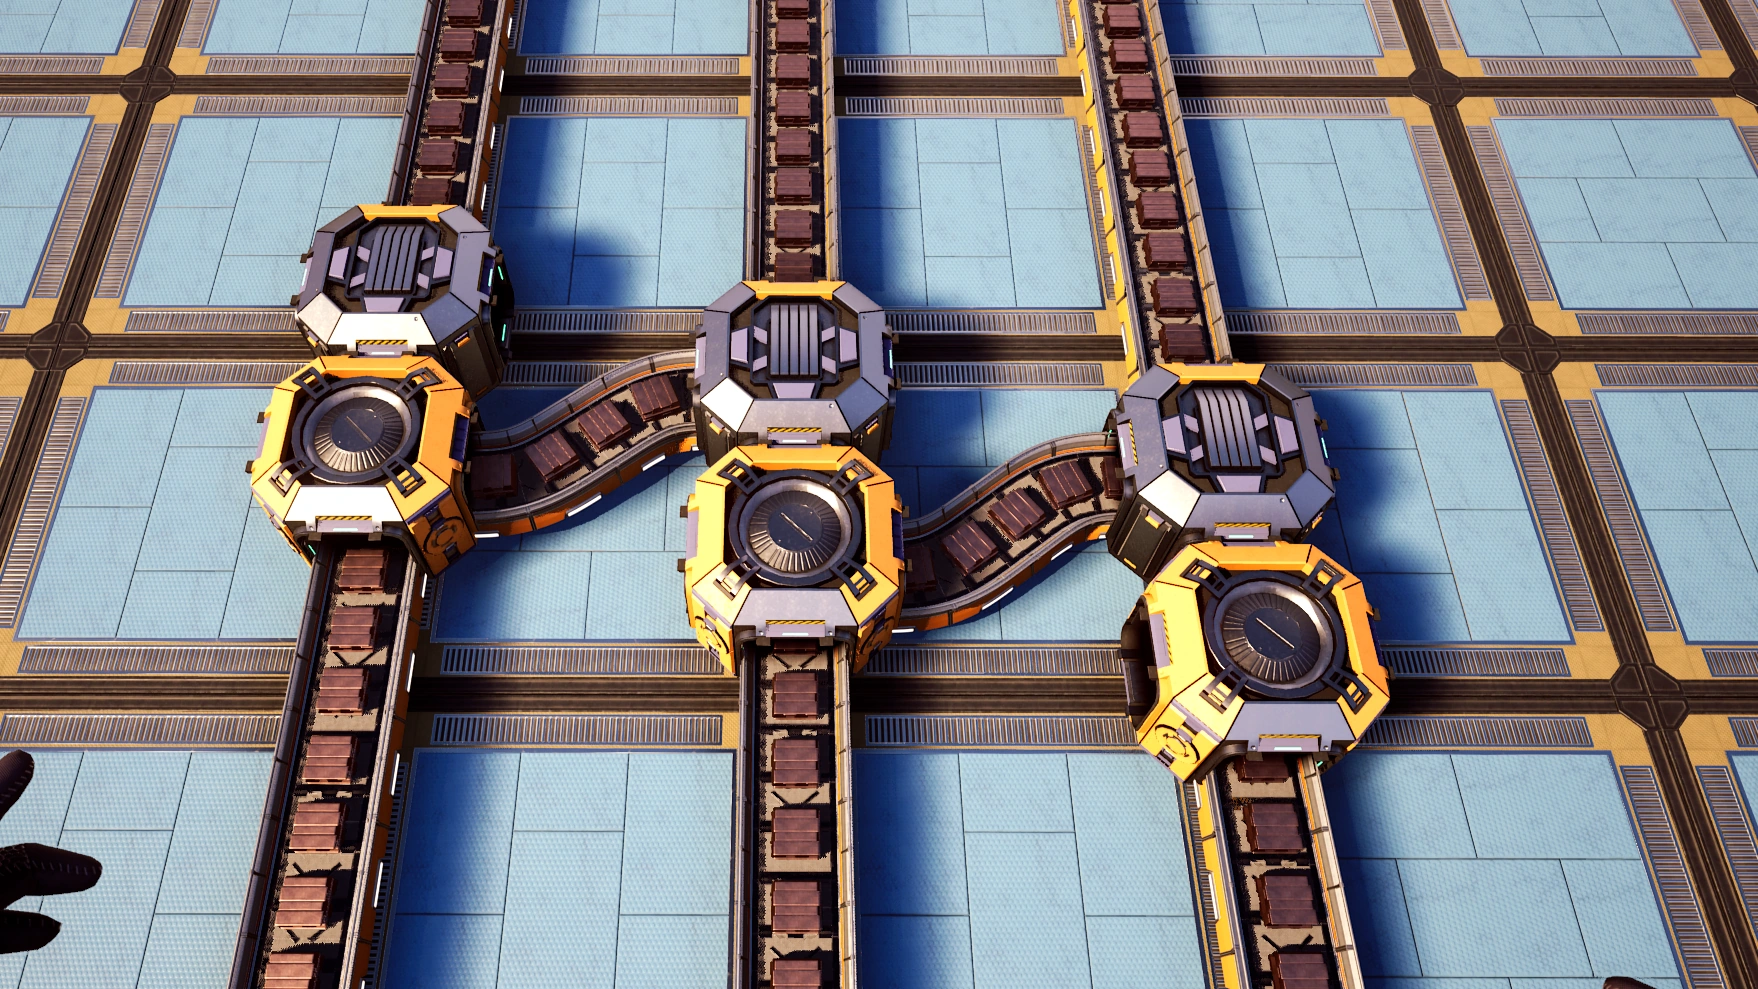
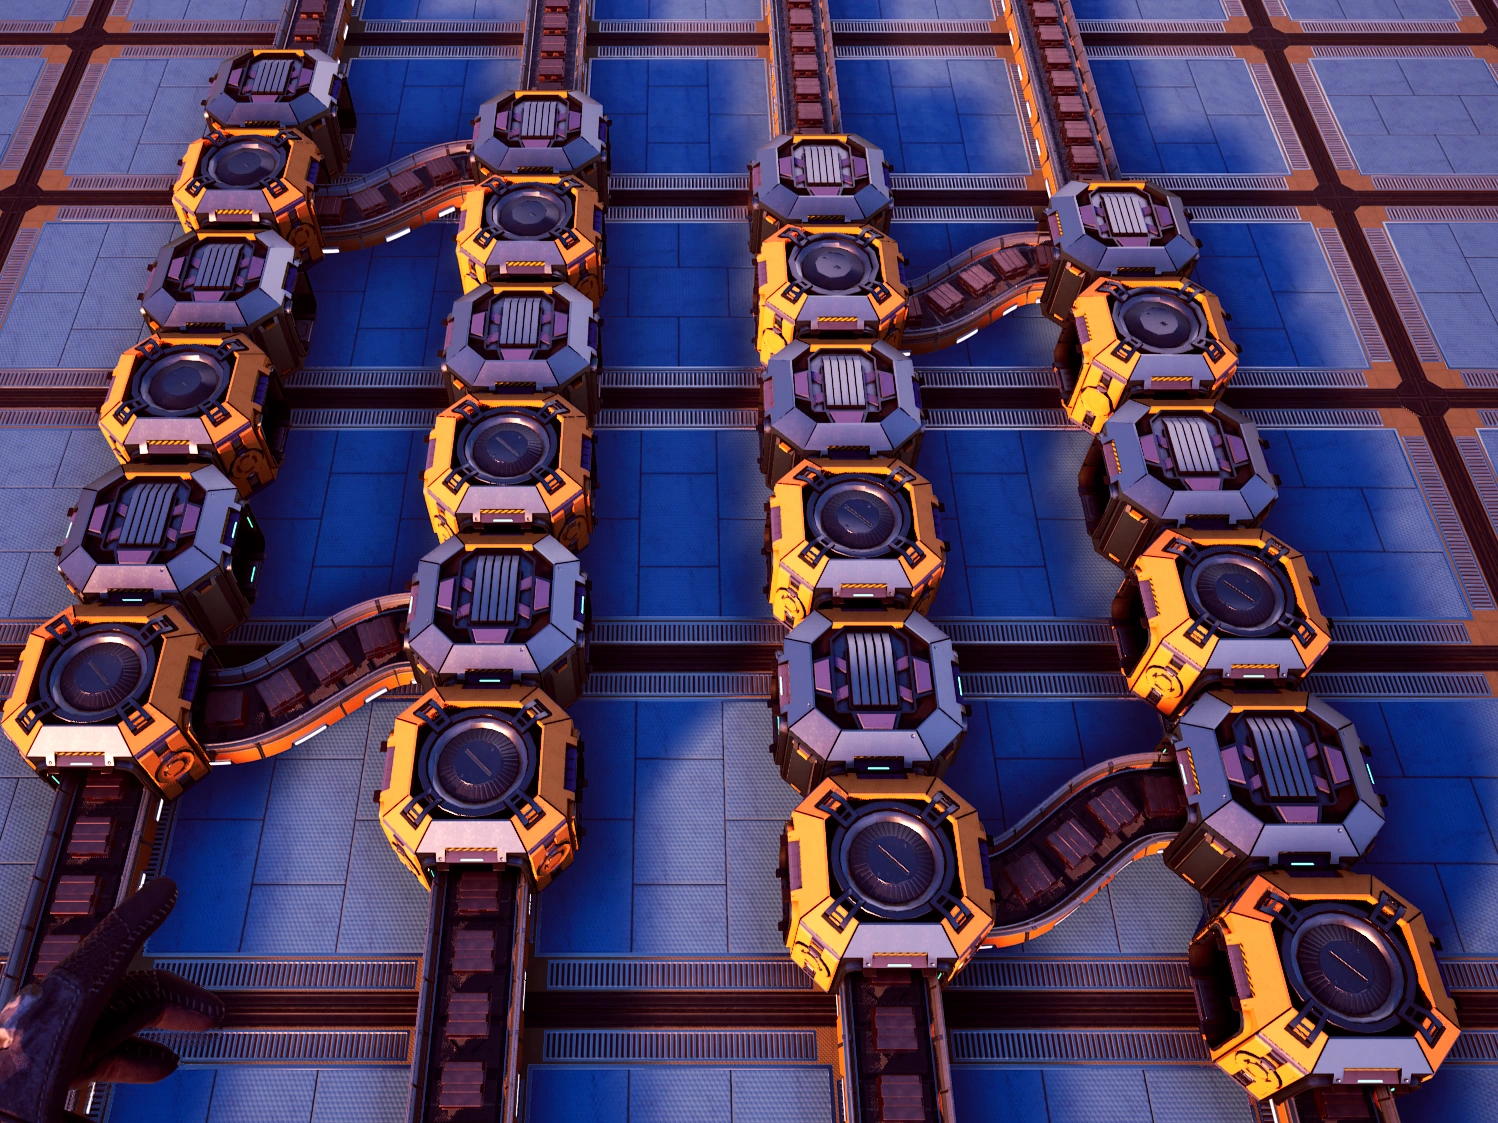
Nested balancers built from simple 1:2 or 1:3 balancers.

Balancers built from a combination of 1:2 and 1:3 balancers.

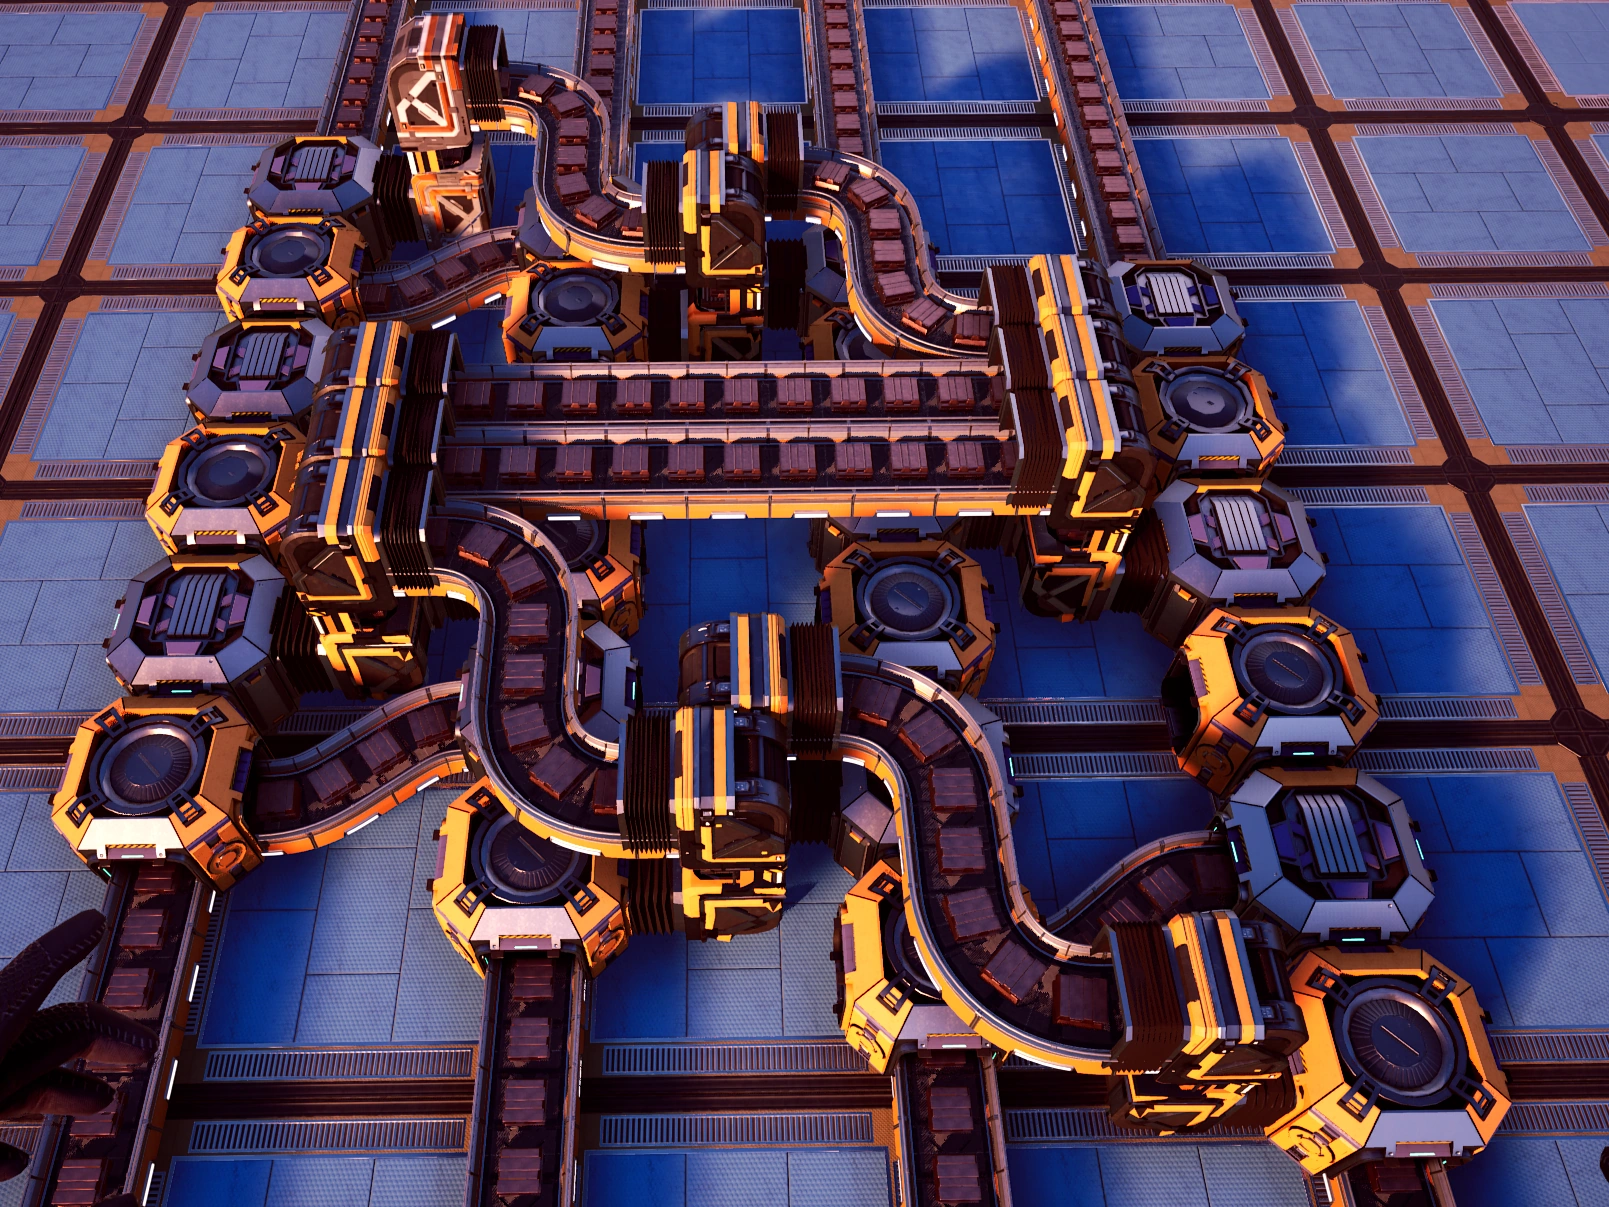
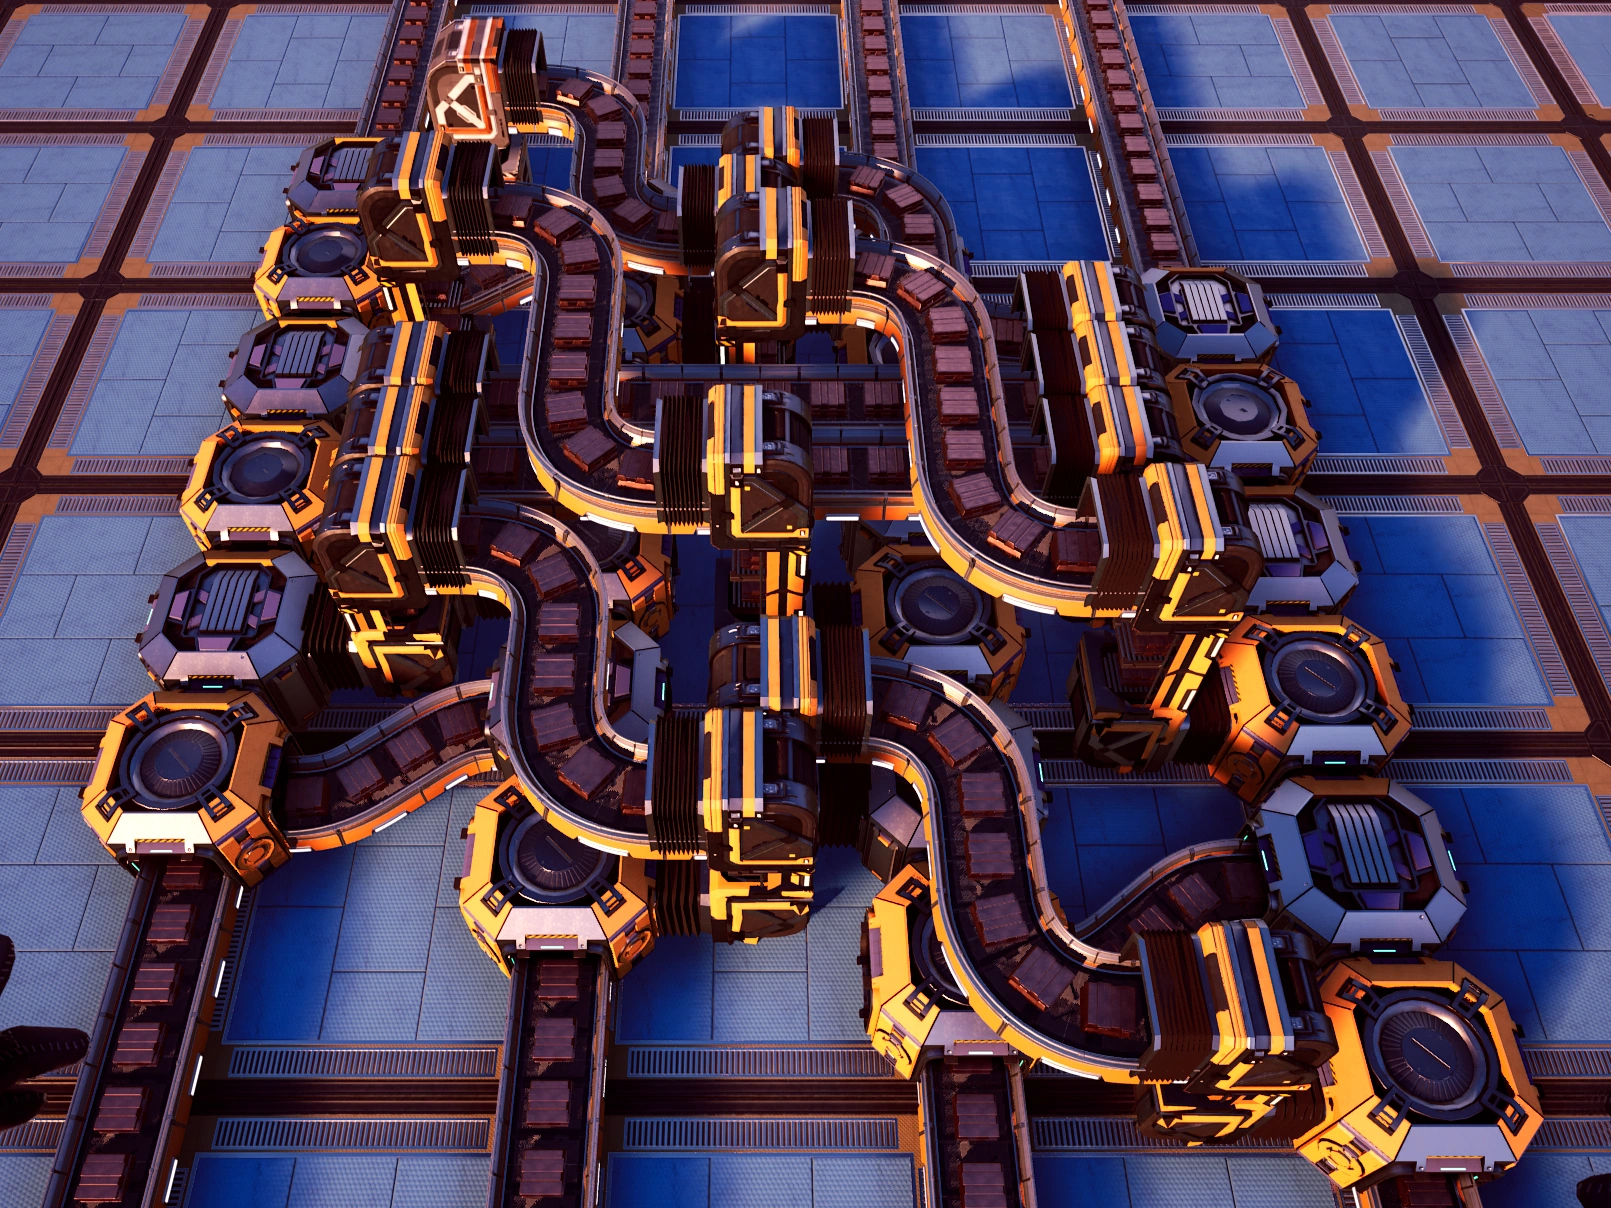
Odd-number balancers with loop-back (prime splitter arrays). The top examples have bottleneck problem, the bottom examples don't.

Belt balancer
A Belt balancer splits n:m belts equally (n input belt, m output belts).
Construction
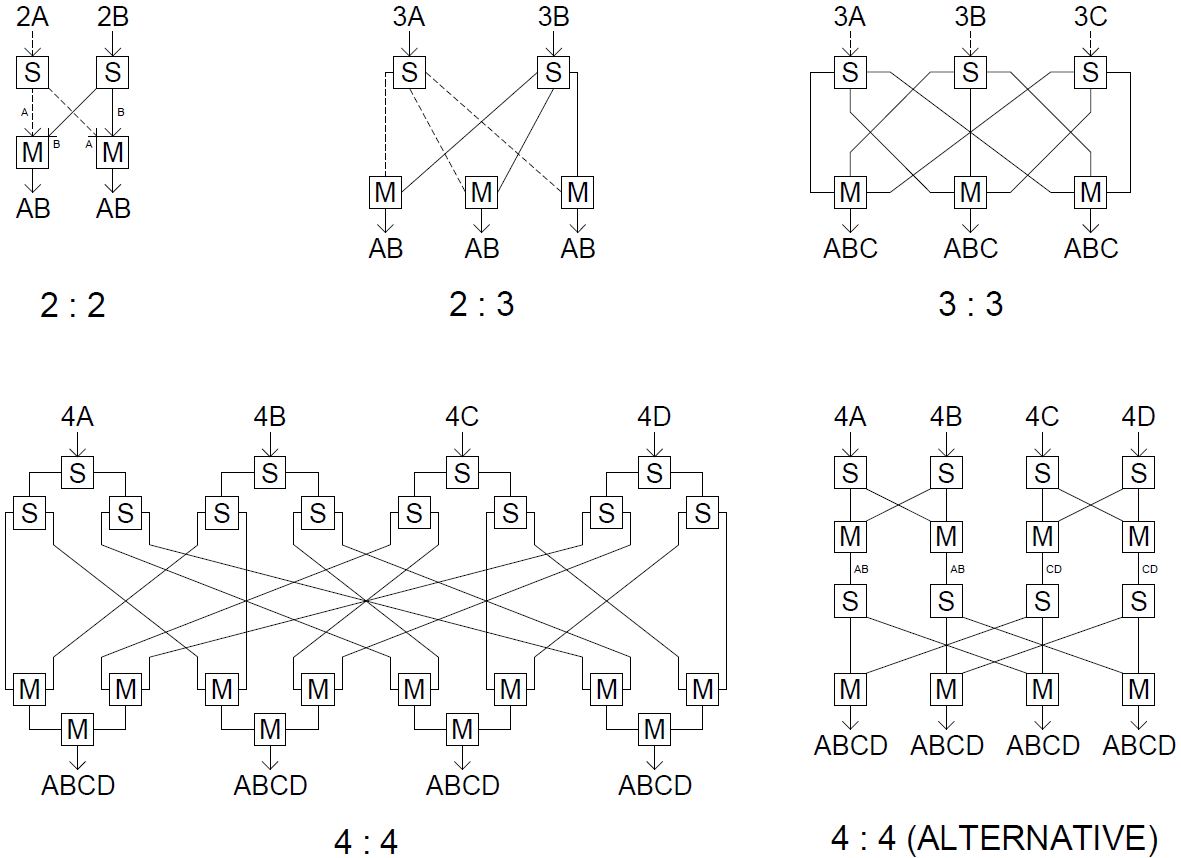
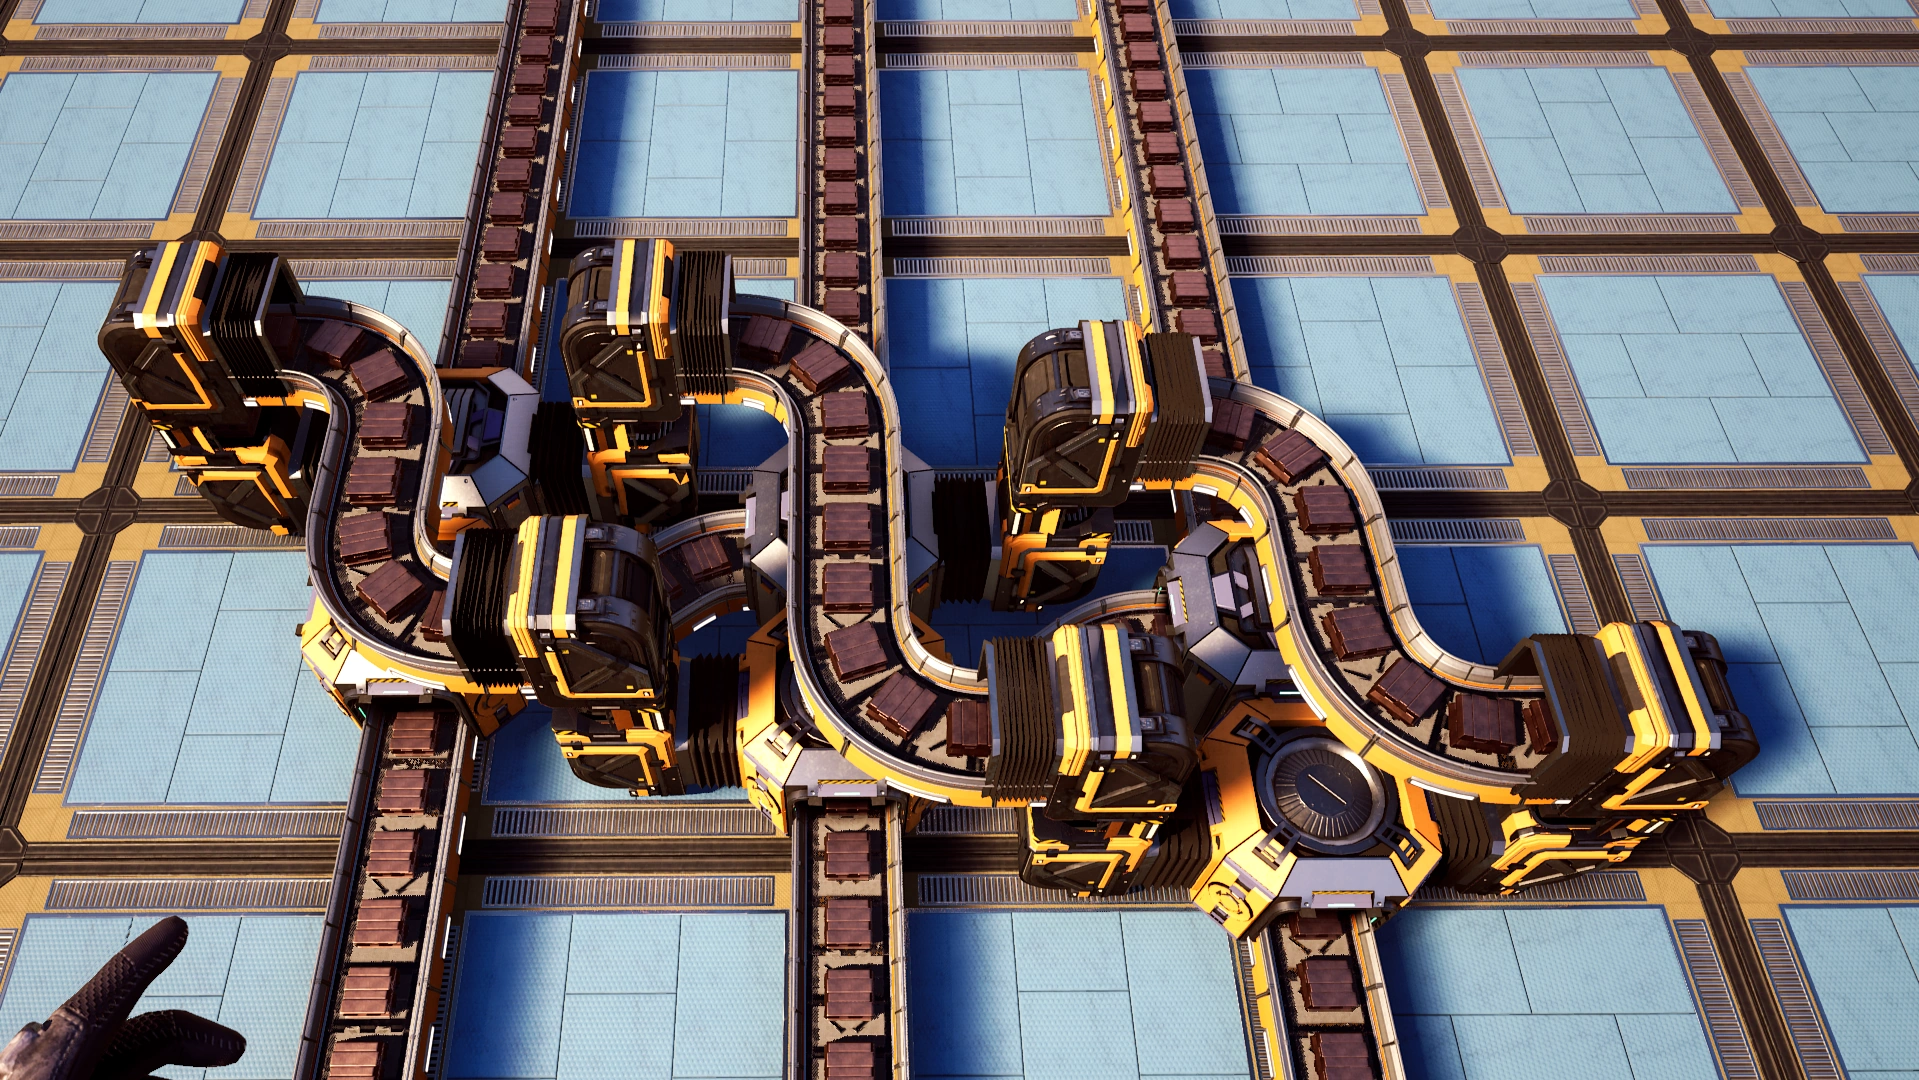
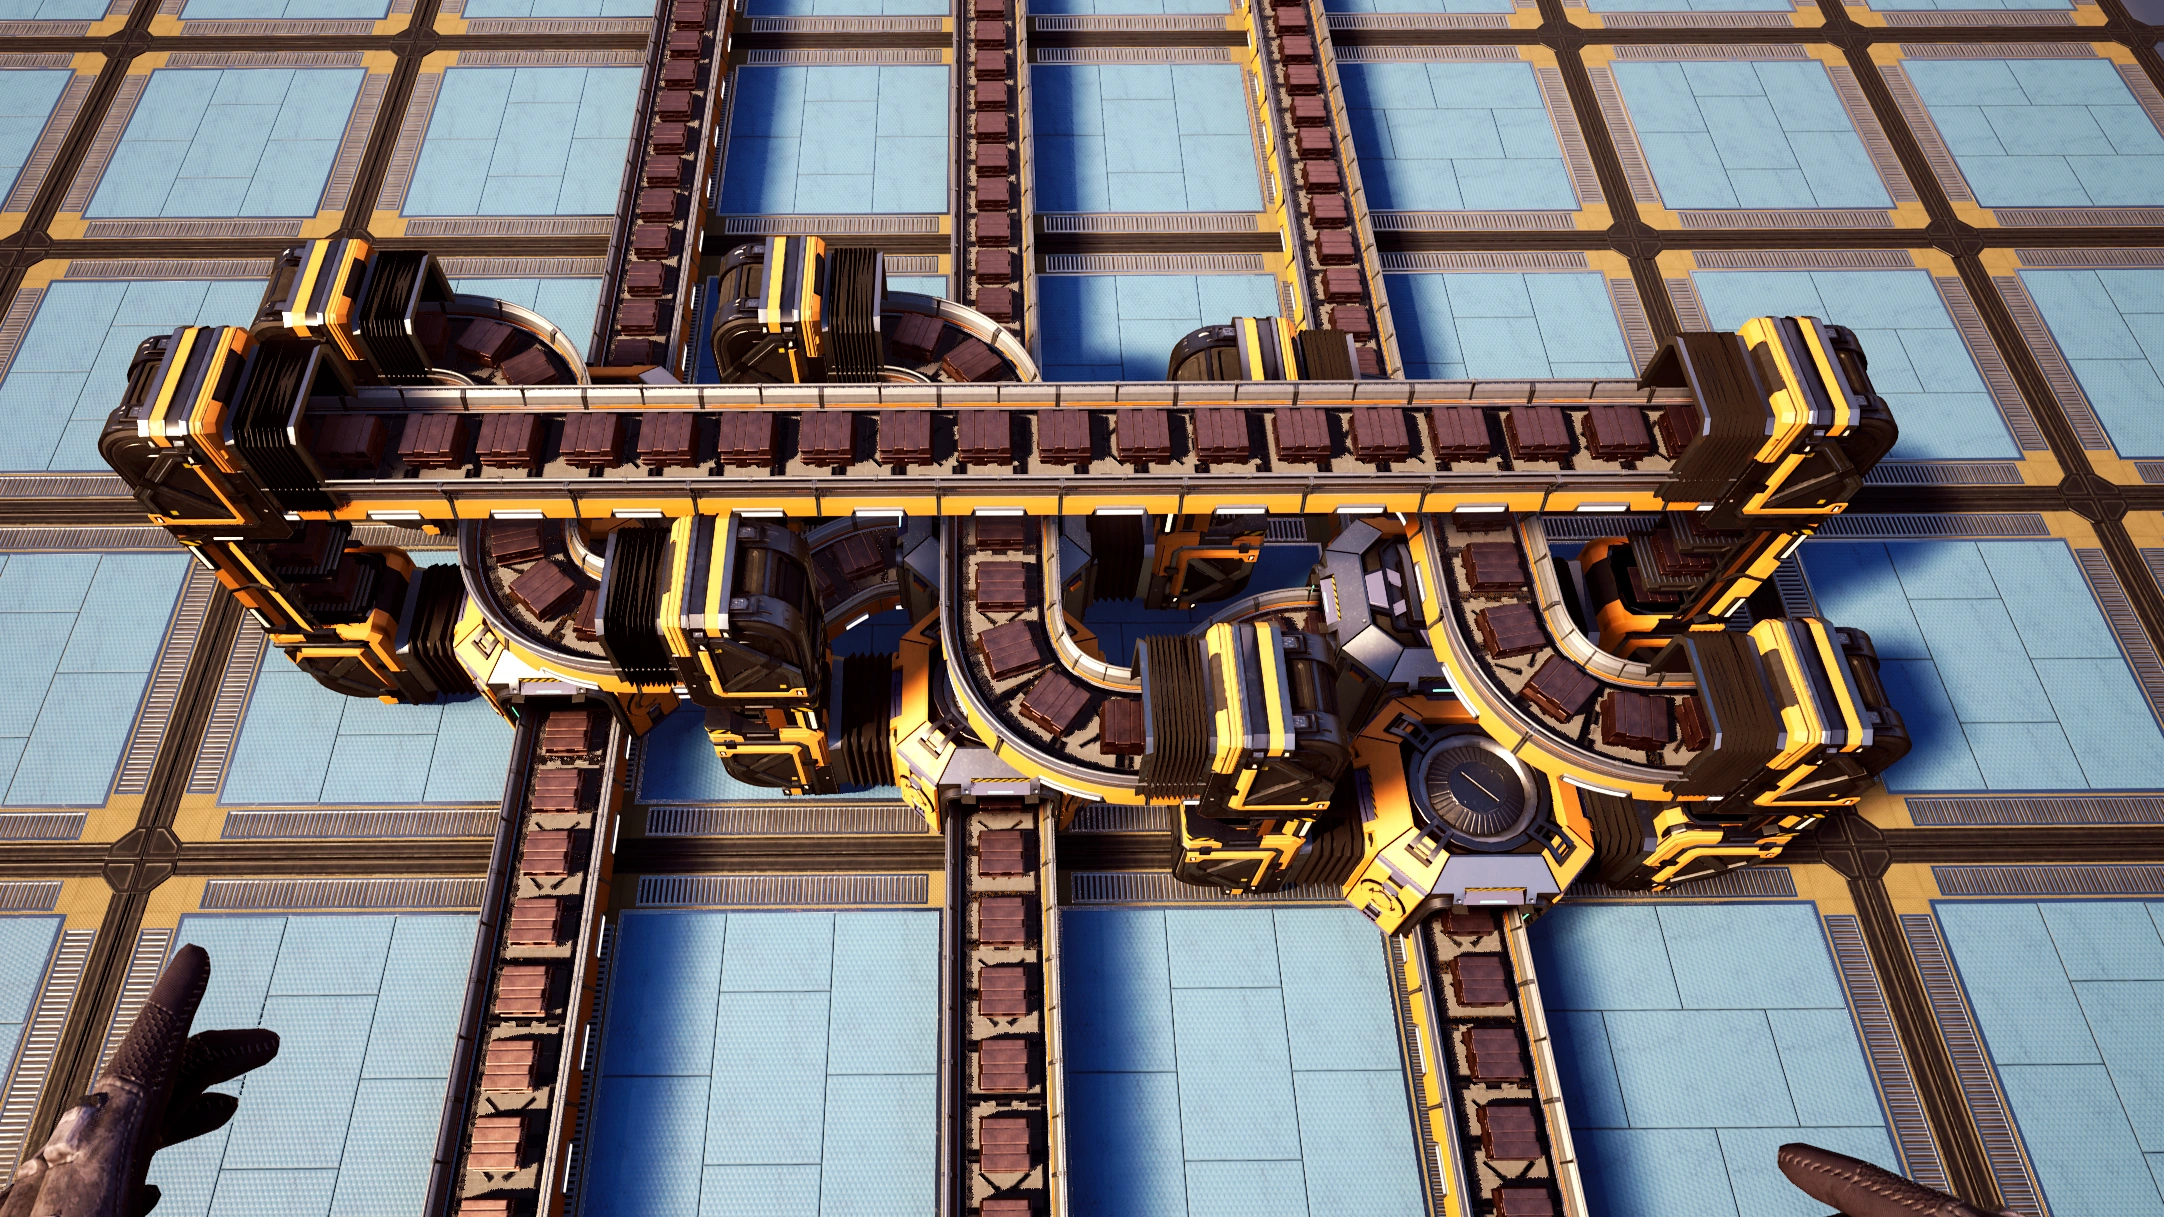
A belt balancer can be built by interlacing multiple load balancers such that they have multiple input and multiple output.
- To maintain the throughput, make sure no segment of the belt is having an item flow rate higher than the capacity of the belt.
- As such, always split before merge.
Elimination
Whenever possible, avoid the usage of belt balancer.
- Consider using manifold instead, if the total item throughput is within the capacity of a belt.
- Use modular building style for low-compression item, such as Screw and Quickwire. Group them in close-proximity with the buildings that use these ingredients.
- If the output of a building exactly matches the input of another building, pair these buildings up.
- Pair an Iron Ingot Smelter with an Iron Plate Constructor.
- Pair 2 Wire Constructors with a Cable Constructor.
- If the item flow rate of the incoming belts are known to be equal, there is no need to balance them, regardless if each belt is full or not.
- Example, two belts carrying 780 Iron Ore each.

Schematics of belt balancer n:m.
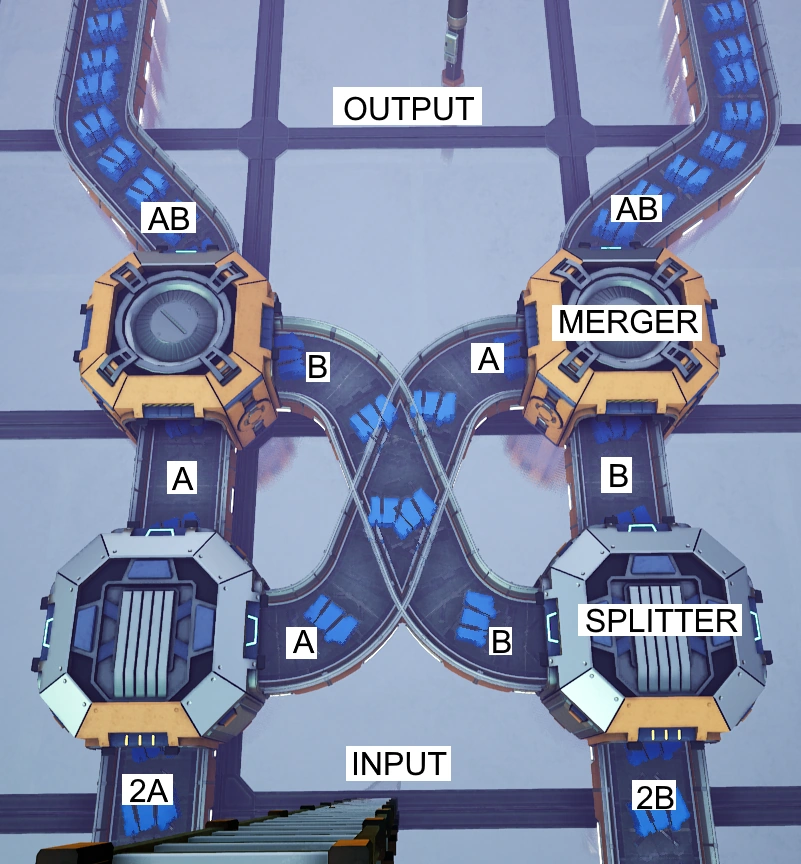
2:2 belt balancer.
Belt compressor
- Sometime it is useful to compress n-number of belts into m-number of full-belts, with the last belt carrying the remainder. This may be applicable in mega-factory building.
Schematics of belt compressor. If the remainder plus the incoming belt is less than a full belt capacity, continue merging to the next belt.

Balancer Examples
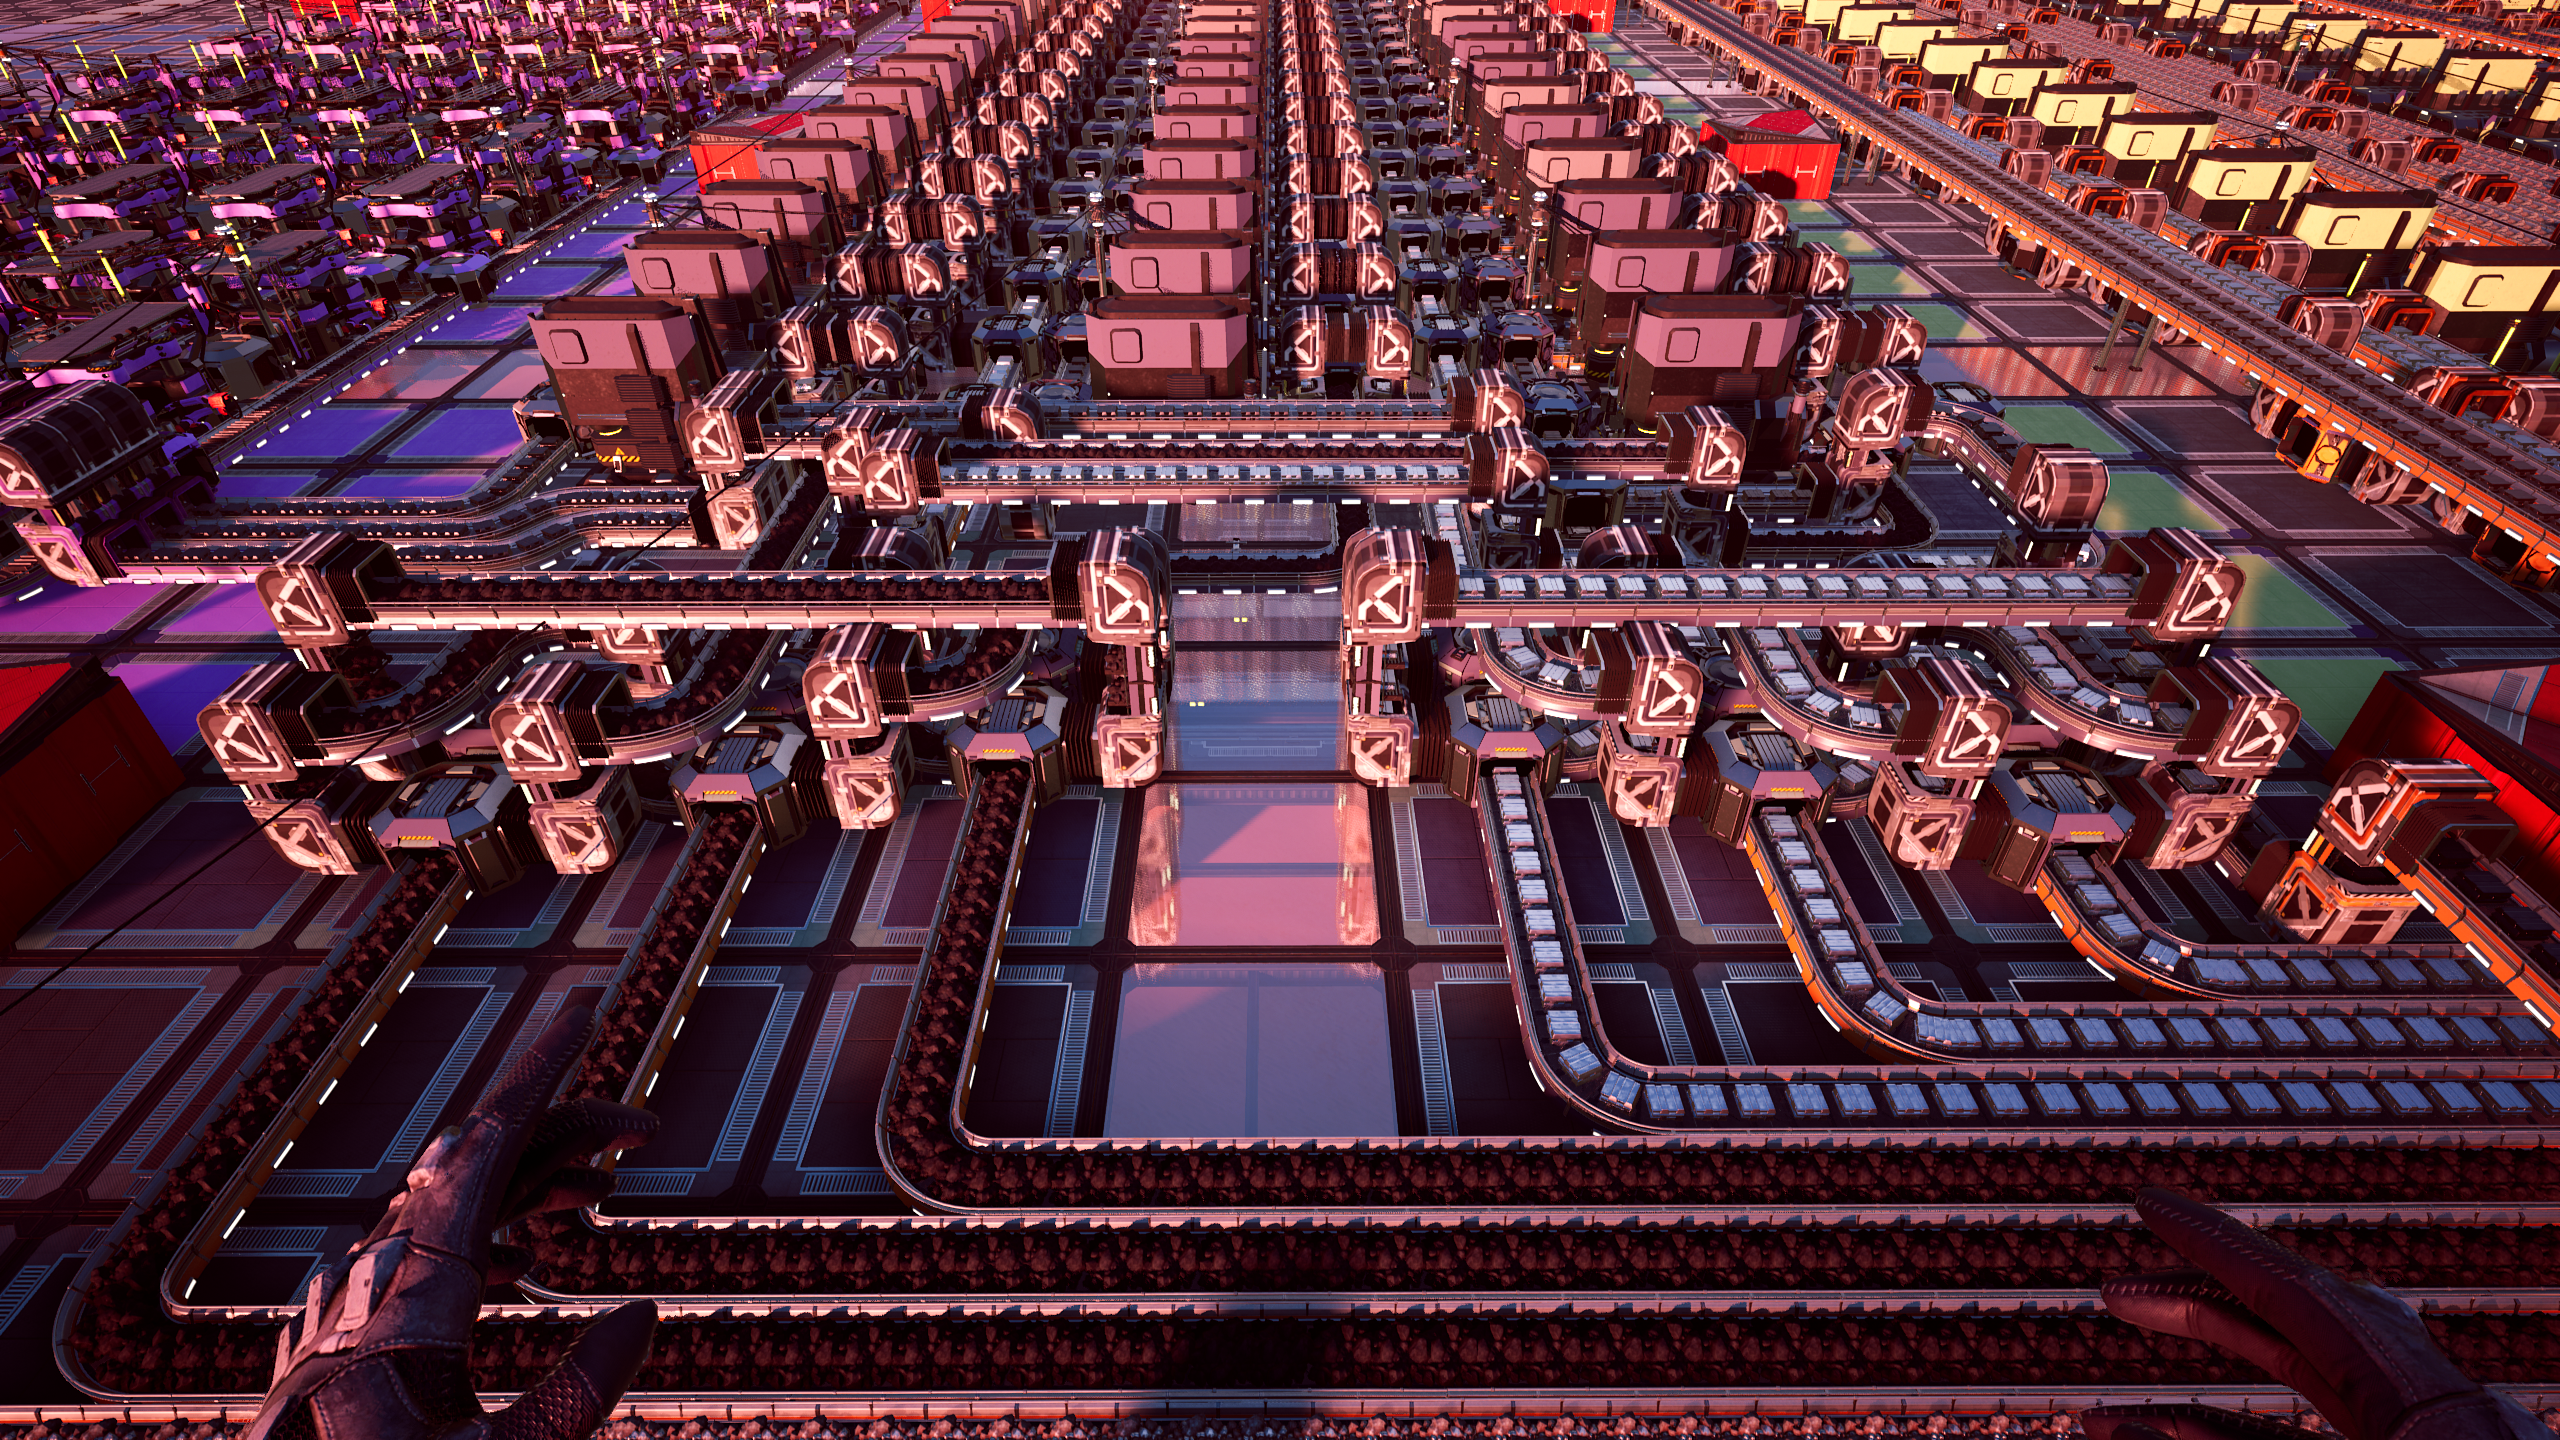

Perhaps the most important element of factory design in Factorio was balancers. Balancers aren't as critical in Satisfactory for two reasons. The first is that even a massive factory can operate with only a few max-level belts of a single material on the main bus. The second is that Satisfactory machines have much larger buffers on the input and output. This allows for much greater irregularity in belt flow before machines start losing efficiency. That being said, balancers are still important.
The concept of balancers is pretty simple. The output belts should be able to draw from the input belts at any ratio. There are hundreds of ways of configuring these but here are a few examples.
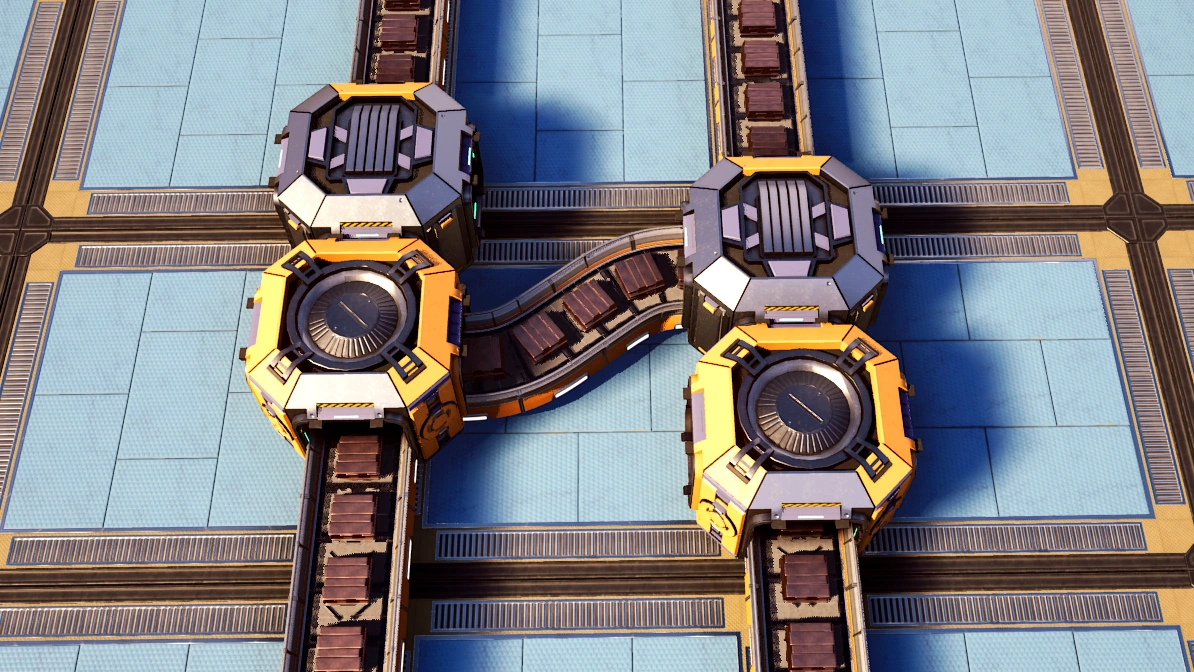
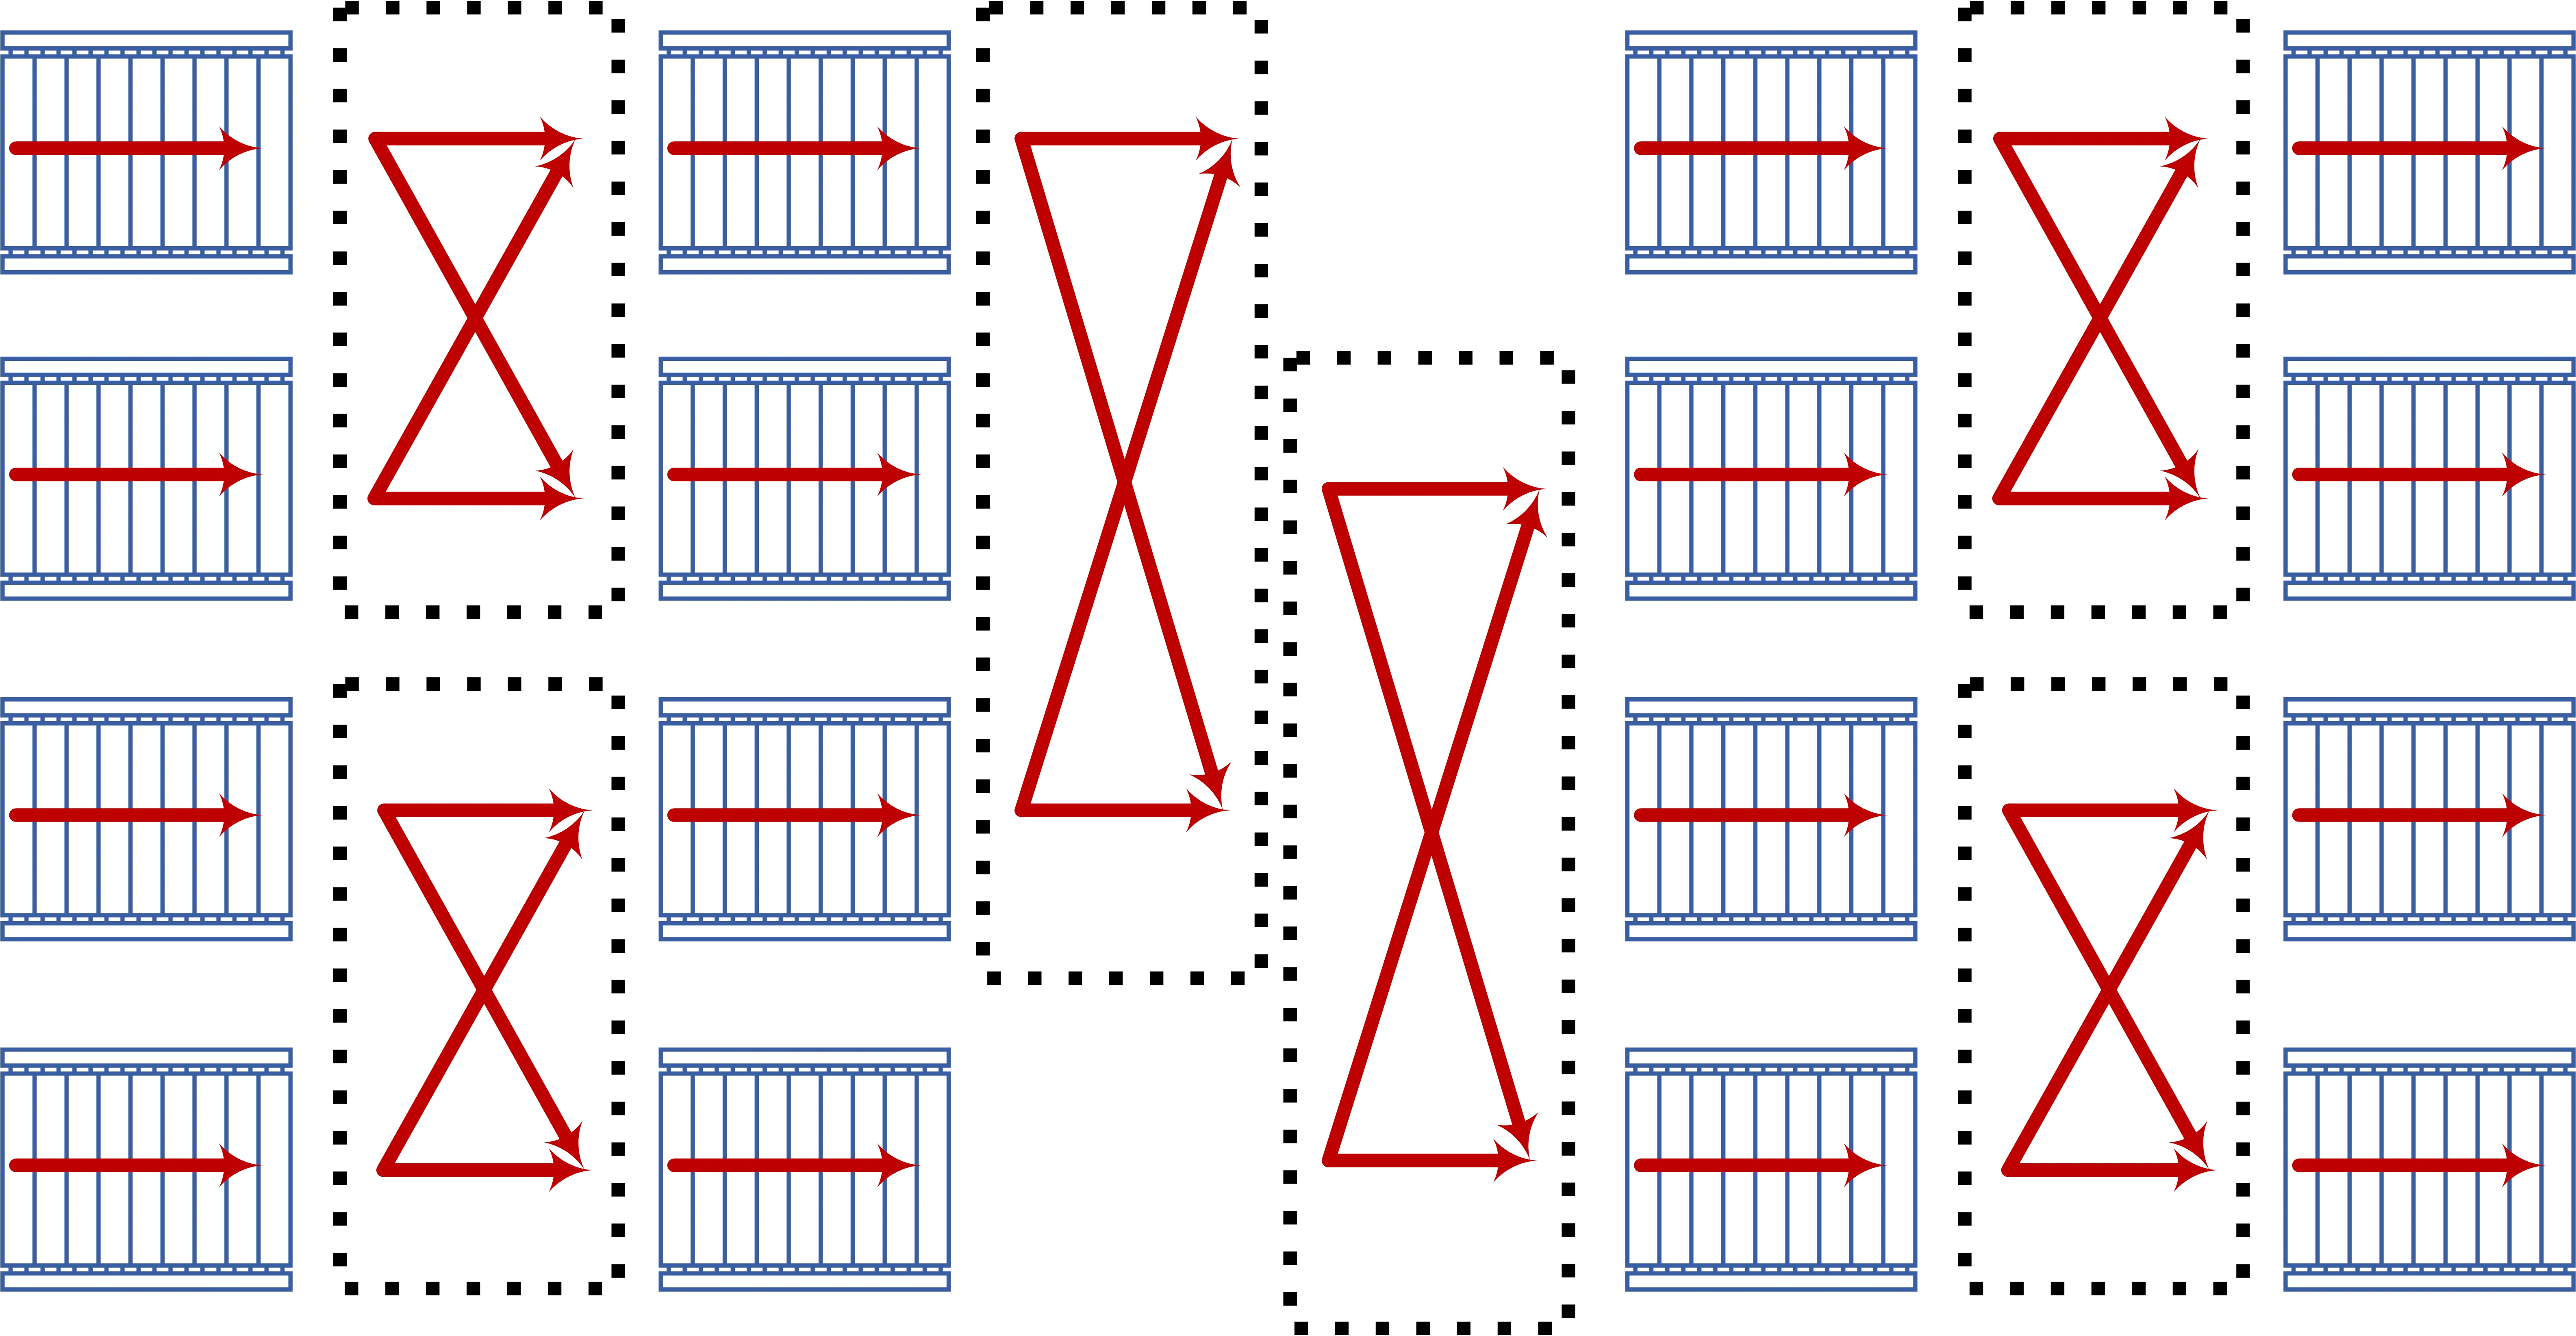
2-to-2 Belts
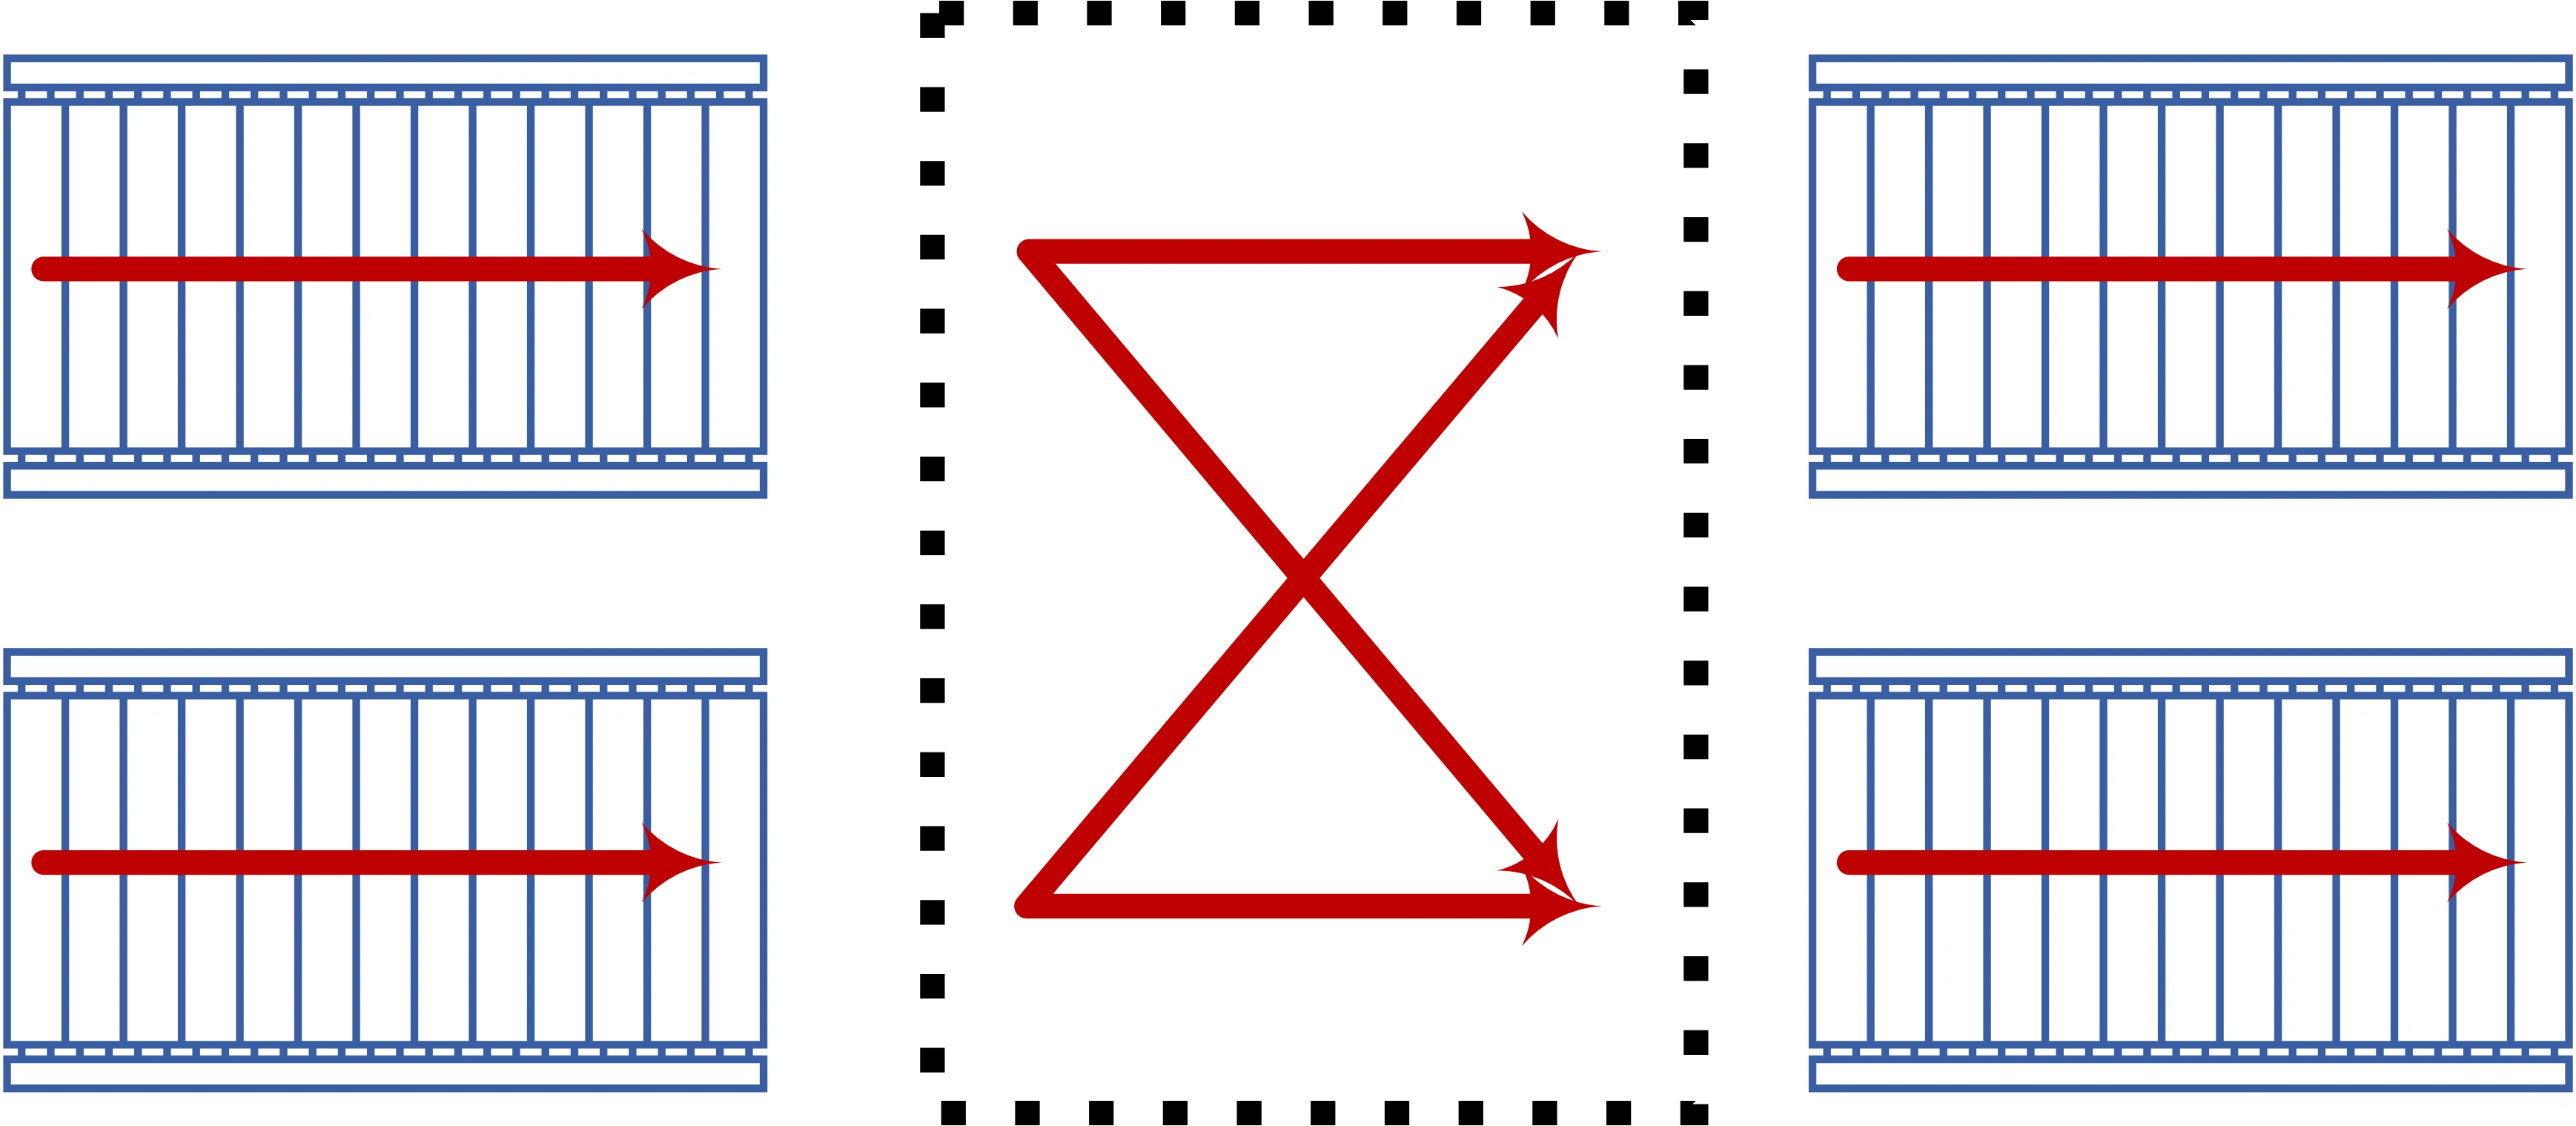
Schematic of a 2-to-2 belt balancer
Definitely the easiest configuration, there are a load of ways to do this one. One possible configuration looks like this. Left shows the first layer, right the second.
Layer 1
Layer 2
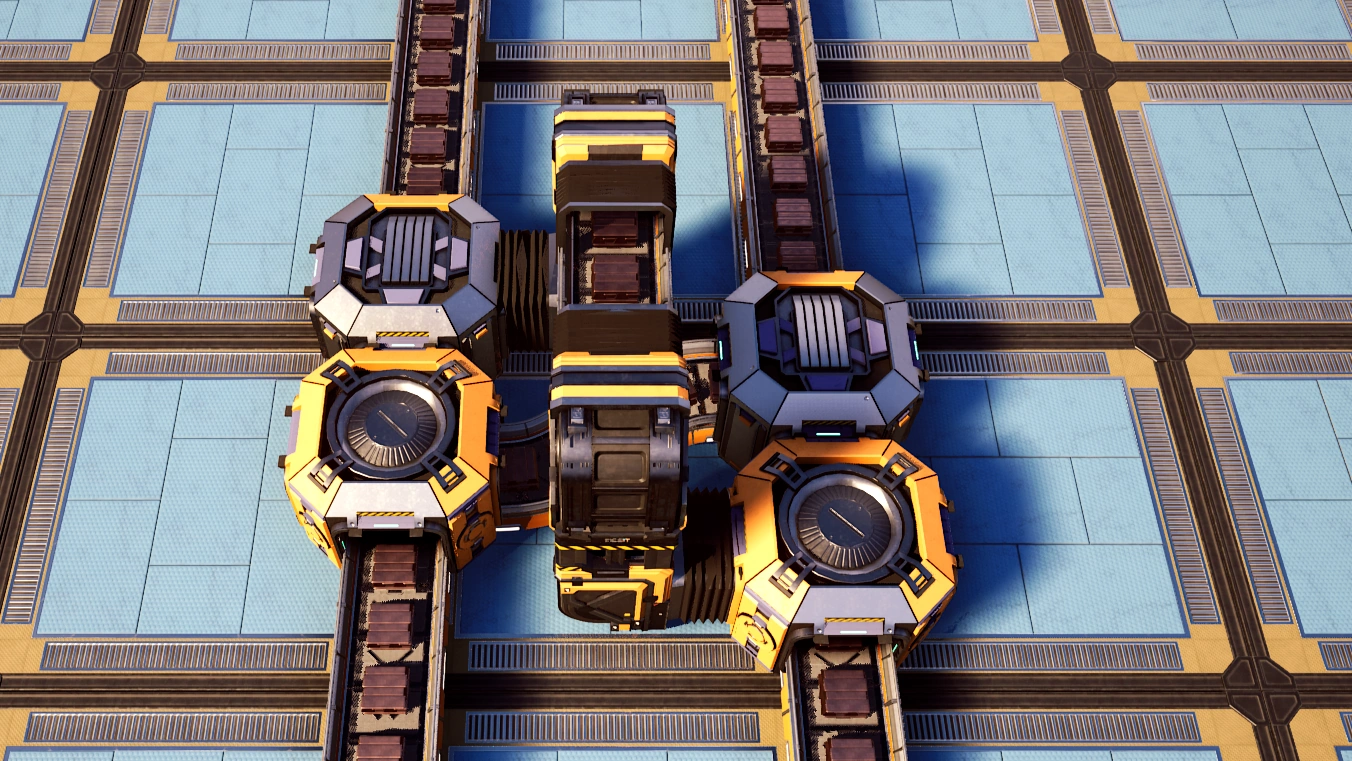
3-to-3 Belts

Schematic of a 3-to-3 belt balancer
The unique thing about Satisfactory, when compared to Factorio, is the fact that splitters and mergers operate on a 3-to-1 ratio. This means that, unlike Factorio, 3-to-3 belt balancers are straightforward. An example configuration looks like this with left-to-right showing the build-up of the layers.
Implementation of a 3-to-3 belt balancer.
Layer 1
Layer 2
Layer 3
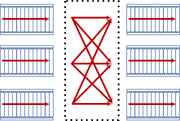
4-to-4 Belts
Schematic of a 4-to-4 belt balancer
4-to-4 belts are where balancers get interesting. An example using a grid of 2-to-2s as shown in the schematic on the right.
Layer 1
Layer 2
Layer 3
External link
- https://satisfactory-calculator.com/en/balancers by EDSM / Anthor
- https://satisfactory.tash.fyi/ more balancer design.
See also
| |||||||||||||||||||||||||||||